Get Juicy Grilled Ribs Fast: The 4-Hour Quick Method
Craving that irresistible, juicy, and smoky flavor of perfect BBQ ribs fresh off the grill, but don't have all day to achieve it? You're in luck! While many believe truly tender ribs on the grill require an epic, all-day commitment, we're here to bust that myth with a game-changing 4-hour quick method. Imagine serving up fall-off-the-bone deliciousness from your backyard grill in less time than it takes to watch a long movie!
This comprehensive guide will walk you through every step to make perfect, tender, and incredibly flavorful ribs at home, even if you're working with a tighter schedule. We'll leverage smart techniques to accelerate the cooking process without sacrificing that melt-in-your-mouth texture everyone loves. Get ready to impress your family and friends with fantastic ribs on the grill, faster than ever before!
The Secret to Speed & Tenderness: Your 4-Hour Ribs on the Grill Strategy
The magic behind our quick 4-hour method for ribs on the grill lies in a strategic combination of temperature control and the power of moisture. Unlike traditional low-and-slow approaches that can stretch to 6 hours or more, we'll gently increase the heat and introduce a crucial "braising" phase. This means you can get those succulent, smoky ribs from the fridge to your plate in approximately four hours, including prep and rest time.
Here’s a quick overview of how we achieve this:
- Slightly Higher Indirect Heat: We'll maintain a consistent grill temperature a bit warmer than ultra-low-and-slow methods, typically around 300-325°F (149-163°C), to gently speed up the initial cooking.
- The Power Wrap: A significant portion of the cooking time involves wrapping the ribs tightly in foil with a flavorful liquid. This creates a steamy, tenderizing environment that rapidly breaks down connective tissue, ensuring your ribs are incredibly juicy and tender.
- Strategic Finishing: A final kiss of direct heat after unwrapping helps caramelize your favorite BBQ sauce to perfection, creating that desirable sticky glaze.
This method ensures your grilled ribs don't dry out or become tough, but rather emerge from the grill with that coveted "pull-off-the-bone" tenderness and rich smoky flavor.
Step-by-Step: Mastering Ribs on the Grill in 4 Hours
1. Choosing Your Canvas: The Right Ribs
Success begins with selecting the right cut. For a faster method, certain ribs are inherently better suited:
- Baby Back Ribs: These are shorter, leaner, and more tender. They cook noticeably faster, making them ideal for our 4-hour timeline. You'll typically find them sold in full or half racks.
- Spare Ribs: Larger and meatier, spare ribs come from the belly area. While incredibly flavorful, they generally require longer cooking times. If using spare ribs for this method, consider having them trimmed into "St. Louis style" ribs (square-cut with the sternum bone and cartilage removed) for more even cooking.
Regardless of your choice, look for fresh ribs with good marbling – streaks of fat within the meat. This fat is essential for moisture and flavor during the cooking process.
2. Prep for Perfection: Membrane & Rub (Approx. 30-45 Minutes)
Proper preparation is key, even when you're short on time. This stage ensures maximum flavor penetration and tenderness.
- Remove the Membrane: This thin, silvery layer on the bone-side of the ribs, often called "silver skin," is crucial to remove. If left on, it can create a tough, chewy texture and prevent your seasonings and smoke from fully penetrating. Use a butter knife or the handle of a spoon to lift a corner of the membrane from the edge of the rack. Once you have a grip, use a paper towel for better traction and pull the membrane off in one smooth motion.
- Season Generously: A good dry rub is the foundation of amazing ribs on the grill. You can use your favorite store-bought BBQ rub or whip up your own. A classic blend includes:
- ¼ cup brown sugar
- 2 tablespoons paprika (smoked paprika for extra depth)
- 1 tablespoon garlic powder
- 1 tablespoon onion powder
- 1 tablespoon coarse salt
- 1 teaspoon black pepper
- ½ teaspoon cayenne pepper (optional, for a kick)
3. Heat Things Up: Setting Your Grill for Success (Approx. 15-20 Minutes)
Proper grill setup is non-negotiable for tender, juicy ribs on the grill.
- Indirect Heat is Critical: Whether you have a gas or charcoal grill, you must set it up for indirect heat. This means your ribs will cook next to, not directly over, the heat source.
- Gas Grill: Light one or two burners on one side of the grill to medium-low, leaving the adjacent burners off. The ribs will cook on the unlit side.
- Charcoal Grill: Bank your lit coals to one side of the grill, creating a hot zone and a cooler, indirect cooking zone on the opposite side.
- Target Temperature: Preheat your grill to a consistent 300-325°F (149-163°C). Use a reliable grill thermometer (the one built into your lid might not be accurate) to monitor the temperature at grate level in the indirect zone. This slightly higher temperature helps accelerate the cook.
- Add Smoke (Optional but Recommended): For that authentic BBQ flavor, toss a handful of pre-soaked wood chips (applewood, hickory, or cherry work wonderfully) onto your hot coals or in a smoker box on a gas grill. Add them just before placing the ribs to get a good initial burst of smoke.
4. The Grilling Gauntlet: Low, Slow & Steamy (Approx. 2.5 Hours Cook Time)
This is where the magic happens for our accelerated method.
- Initial Grill Phase (1.5 hours): Place the seasoned ribs, bone-side down, directly on the grill grates in the indirect heat zone. Close the lid and maintain your grill's temperature between 300-325°F (149-163°C). Avoid opening the lid too frequently, as this releases heat and smoke, extending cooking time. Check every 30-45 minutes to ensure the temperature is stable and add more wood chips if desired for continuous smoke.
- The "Wrap & Braise" Phase (1 hour): After 1.5 hours, carefully remove the ribs from the grill. Lay out two large sheets of heavy-duty aluminum foil per rack, overlapping them slightly to create a strong seal. Place the ribs meat-side down on the foil. Now, for the secret to quick tenderness: add about ¼ cup of liquid per rack. Good options include apple juice, apple cider vinegar, beer, or even a mix of honey and butter. This liquid will steam and braise the ribs, rapidly tenderizing them. Wrap the ribs tightly, sealing all edges to prevent steam from escaping. Return the wrapped ribs to the indirect heat zone of your grill for another 1 hour, maintaining the 300-325°F (149-163°C) temperature.
5. The Grand Finale: Saucing & Finishing (Approx. 15-20 Minutes)
Almost there! This step adds that sticky, caramelized glaze.
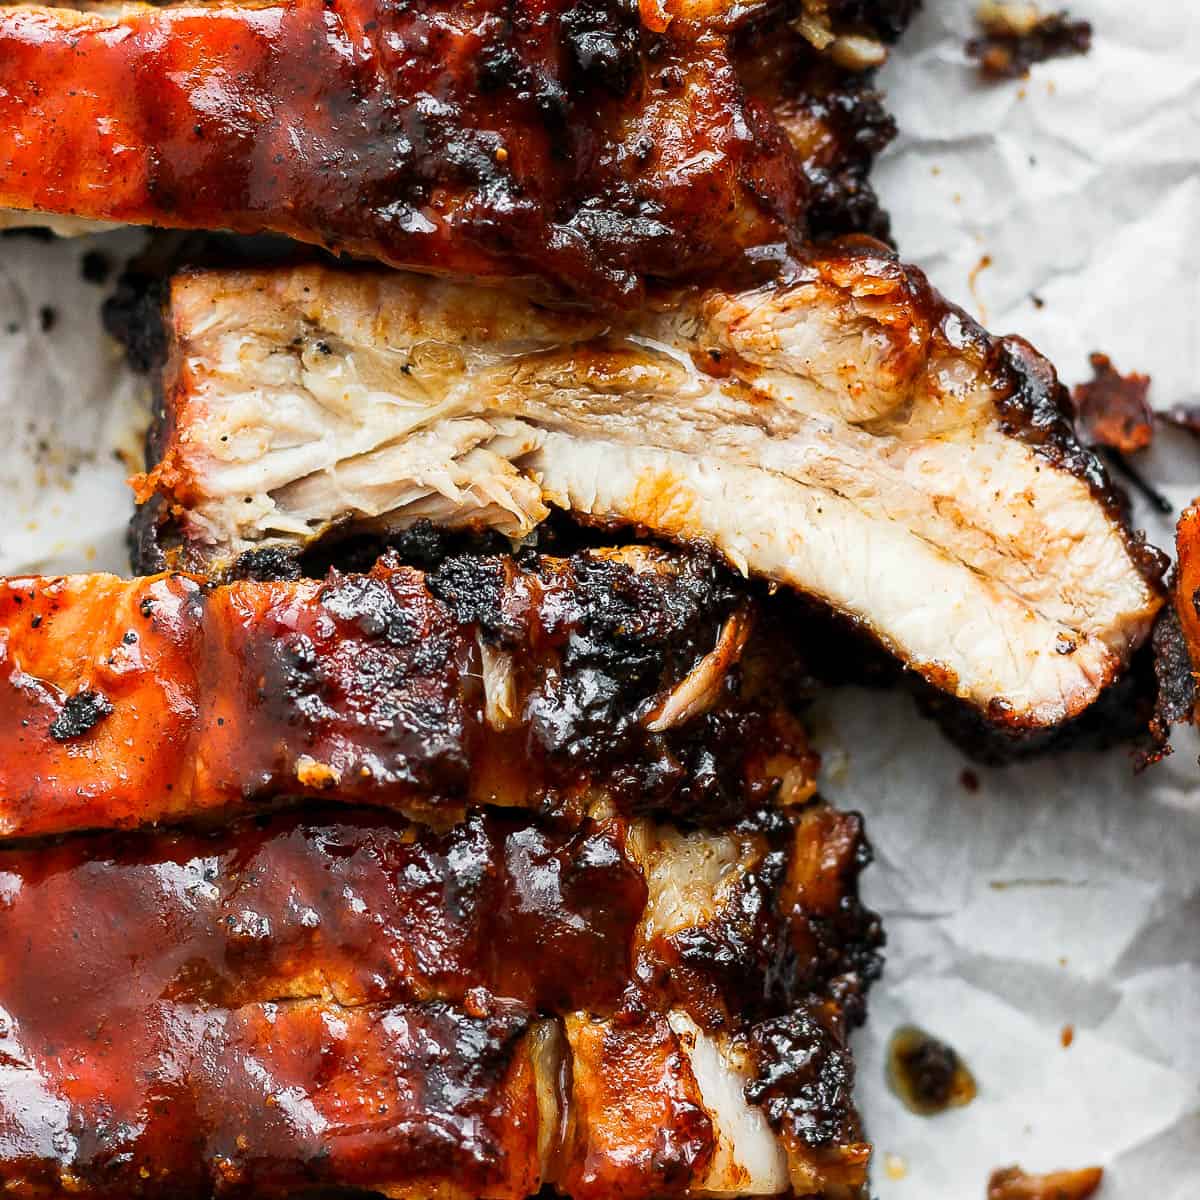
- Unwrap and Sauce: Carefully unwrap the ribs, being mindful of the hot steam and liquid. Place them back on the indirect heat zone, meat-side up. Brush generously with your favorite BBQ sauce.
- Caramelize and Glaze: Move the ribs briefly to the direct heat zone, if possible, or increase the heat on your indirect side slightly. Cook for about 5-7 minutes per side, flipping once and saucing again, until the sauce is slightly tacky and caramelized. Watch them closely, as the sugar in BBQ sauce can burn quickly. You're aiming for a beautiful glaze, not char.
6. The Patience Payoff: Rest & Serve (Approx. 10-15 Minutes)
This final step is crucial for juicy ribs on the grill!
Once glazed, remove the ribs from the grill and let them rest, loosely tented with foil, on a cutting board for 10-15 minutes. This allows the juices to redistribute throughout the meat, ensuring every bite is moist and flavorful. Don't skip this step!
Finally, slice the ribs between the bones and serve immediately with extra sauce on the side. They pair perfectly with classic BBQ sides like coleslaw, cornbread, and baked beans.
Pro Tips for Achieving Ribs on the Grill Greatness
- Doneness Tests: You'll know your ribs are perfectly done when:
- The meat has pulled back from the ends of the bones by about ½ to 1 inch.
- You can gently twist a bone, and it feels loose or starts to separate easily.
- The internal temperature (measured with an instant-read thermometer away from the bone) is around 200-205°F (93-96°C) for maximum tenderness. This is higher than food safety temperatures but ideal for connective tissue breakdown.
- Master Your Grill's Hot Spots: Every grill has them. Learn where your grill runs hotter or cooler and rotate your ribs if necessary for even cooking.
- Moisture is Your Friend: Beyond the wrap, a small pan of water placed in the indirect zone can help maintain humidity, preventing your ribs from drying out during the initial cook.
- Experiment with Rubs & Sauces: Don't be afraid to customize! The beauty of ribs on the grill is the endless variety of flavor profiles you can create.
- If You Have More Time: If you find yourself with an extra hour or two, consider a longer dry brining period (salting the ribs and letting them sit uncovered in the fridge overnight) or even exploring BBQ Ribs on the Grill: Low & Slow Secrets for Perfect Tenderness for an even deeper smoke flavor.
Grilling truly delicious ribs doesn't have to be an all-day affair. With this 4-hour quick method, you can achieve incredibly tender, juicy, and flavorful ribs on the grill that will satisfy any BBQ craving. By strategically managing heat and moisture, you get to enjoy that classic smoky goodness without the long wait. So fire up your grill, gather your ingredients, and get ready to create some unforgettable backyard BBQ memories!
